DIY Hub
How to install your DIY roller blinds
Roller blinds have never looked so good, especially when you can proudly say you installed them yourself! Your friends will all be asking how...
Whether you choose an inside or outside mount, the installation instructions are the same. So, gather your supplies – along with the blind, you'll need a pencil, drill, screwdriver, measuring tape and a spirit level (if you have one) – and get ready to DIY. Please note that these instructions are only suitable for our Galaxy or Chicago range.
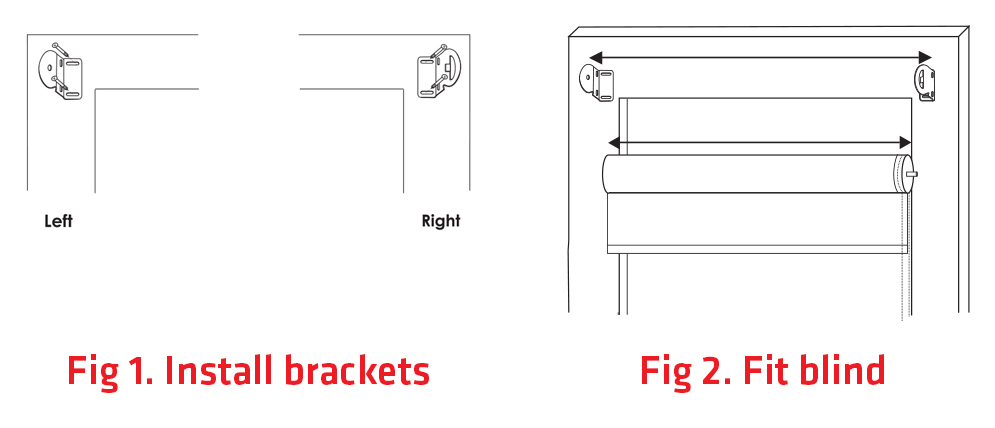
- Each roller blind comes with a 'male' and a 'female' bracket. The male bracket is used to control the chain, while the female side is used for the pin end. Make sure you know which bracket is going where.
- Hold the brackets up to the window frame or wall and mark through the holes with a pencil.
- Drill a small 2mm pilot hole where you've placed the pencil marks. This will make screwing in your brackets much easier.
- Screw the brackets to the wall or window frame. Check to ensure they are aligned evenly and are straight. A spirit level is a great way to check this.
- Insert the chain control into the end of the roller and then secure into the bracket. Do the same for the other side with the spring loaded pin, and fit into the remaining bracket.
- Your blind is now secured into position. Operate it by pulling on the chain to raise or drop your roller blind.
- Lastly, screw in the child safely device at the bottom of the chain.
- Important: Screw the child safety device into the window frame/secure wall at no less than 1600mm from the ground. Read the instructions carefully to ensure correct installation of the child safety device.
Check out our safety infographic and article on window blind safety for some more tips.
You're all done! Time to sit back and enjoy your handiwork. Or get moving on the rest of your windows...